Introduction #
Items in Kaamfu represent the actionable tasks that teams work on within Boards. Each item captures a specific piece of work, making it easier to track progress, assign ownership, and measure effort across your workspace.
Location of an Item #
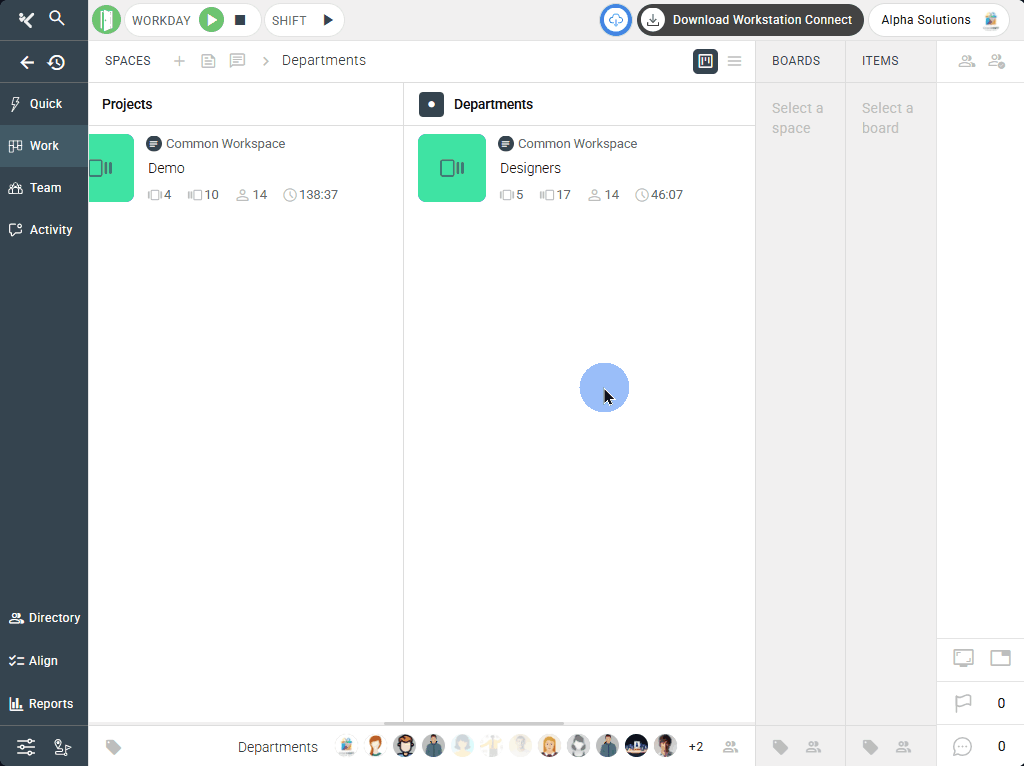
An item exists inside an Item Group, which forms part of Kaamfu’s layered workspace structure. The complete hierarchy is: Space Group → Space → Board Group → Board → Item Group → Item. This sequence defines how every piece of work is organized and tracked.
Each Item Group acts as a container for related items, keeping similar tasks grouped together under a specific Board. When team members log effort against items, that effort contributes to the cumulative total of the parent Item Group, Board, and Space. This hierarchy ensures structured task management and accurate effort tracking throughout Kaamfu.
How to Access an Item #
To view or manage an item, navigate through the workspace using the Work panel on the left navigation bar — one of Kaamfu’s three main panels alongside Team and Activity.
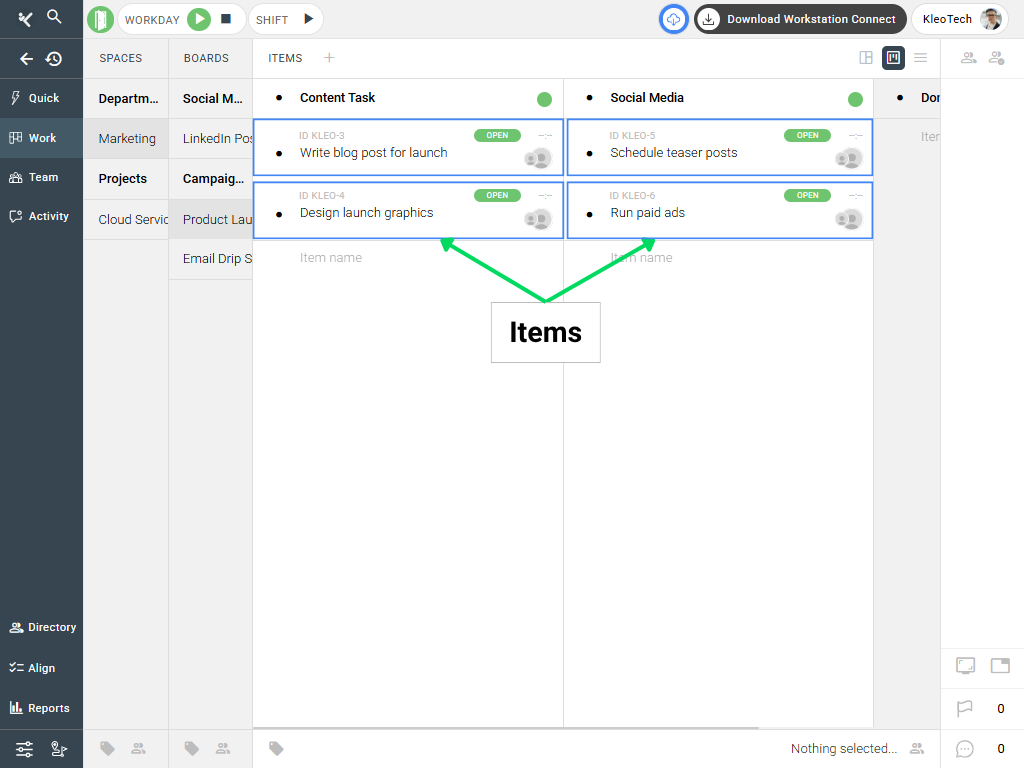
From the Work panel, select a Space Group under the Spaces subpanel, then open the corresponding Space. Switch to the Boards subpanel, choose a Board Group, and open the Board you wish to work in. Once the Board is open, navigate to the Items subpanel. Here, you’ll see vertical columns called Item Groups, each containing multiple tiles. Every tile represents an Item — a distinct, actionable task within that Board.
Why This Feature Matters #
Items are the building blocks of productivity inside Kaamfu. They ensure that every task is clearly defined, assigned, and measurable.
Here’s why they matter:
- Items help break down work into smaller, trackable tasks within a Board.
- They allow you to assign responsibilities to specific associates, ensuring accountability.
- The total effort on a Space or Board is calculated from the combined effort on all items within them.
By creating and managing items effectively, teams can maintain clarity on what needs to be done and how much effort is being invested.
Who Should Read This #
This article is useful for anyone who manages or performs tasks inside a Kaamfu workspace, including:
- Workspace Admins managing workflows
- Team Leads overseeing task assignments
- Associates working on assigned items
Understanding items helps all members keep work structured and measurable.
What This Guide Covers #
In this guide, you’ll learn:
- What an item is and how it fits within Kaamfu’s workspace hierarchy
- How to access and identify items within Boards
- How to create new items inside a Board
By the end, you’ll know how to start adding and managing tasks in your team’s workflow.
Feature Overview #
Items operate at the most granular level of Kaamfu’s workspace hierarchy, where actual task execution happens. Each Item Group within a Board holds several items that represent specific deliverables or responsibilities assigned to associates. The cumulative effort logged across these items directly affects the total effort metrics visible at the Board and Space levels, providing a transparent and data-driven view of work progress.
This structured nesting—from Space Groups down to individual Items—ensures that even complex projects remain organized and measurable, connecting every task to a clear context within the workspace.
Parts of an Item Tile #
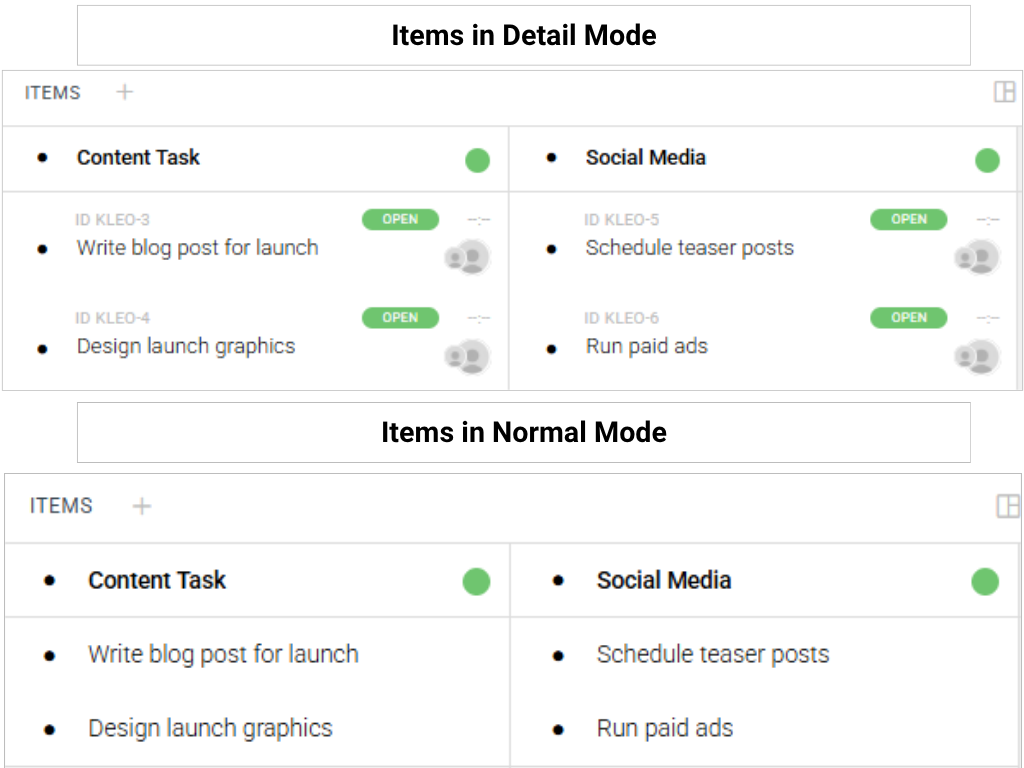
The Items subpanel in a Board has two display modes: Normal mode and Detail mode.
In Normal mode, each item appears as a simple tile showing only the item’s name, which is an editable field. You can double-click the name to rename the item and press Enter to save.
In Detail mode, the item tile displays additional information such as its ID, status, effort, and member avatars, alongside the item name. This view provides a quick overview of task ownership and progress without needing to open the item separately.
#
#
#
#
Together, these two modes give users flexibility to either view a compact list of tasks or see richer task details directly within the Board.
Key Benefits #
Creating and managing items helps you:
- Keep work organized and visible to the entire team.
- Assign clear responsibilities to individuals.
- Track cumulative effort at every level—from item to space.
These benefits ensure better planning, transparency, and accountability across your workspace.
Step-by-Step Instructions #
Follow these steps to create an item within a Board.
Step 1: Open the Board #
Navigate to the Board where you want to add a new item. Ensure that you’re inside the correct Space and Board Group.
Step 2: Open the Items Panel #
Inside the Board, click on the Items panel to view the list of existing Item Groups and items.
Step 3: Add a New Item #
At the bottom of an Item Group, you’ll see a placeholder text labeled “Item name.” Click on it, type the desired task name, and press Enter.
A new item will be created instantly with the name you entered.
Step 4: Assign and Manage the Item #
After creation, you can assign the item to an associate, set effort values, or update its details as work progresses.
Creating items this way keeps your Boards organized and ensures every task is tracked.
Membership in an Item #
You can view or edit an item’s membership through two convenient routes — both of which open the right-side Membership pane for modification.
- Options pill route: Click the item → open the hamburger menu in the options pill → select Membership.
- Chin route: Click the item → click the Membership icon in the chin of the Items subpanel.
Inside the Membership panel, you can add or remove members, change roles between Member and Admin, and view who currently has access to the item. This ensures each item remains properly owned and collaboratively managed.
Who Can Create an Item #
Item creation permissions depend on the user’s role within the workspace hierarchy. Only users with administrative privileges at specific levels can create items.
- Org Owner: Can create items across all Spaces, Boards, and Item Groups.
- Workspace Admin: Has full creation rights across all groups.
- Space Group Admin: Can create items inside any Space, Board Group, or Board within their assigned Space Group.
- Space Admin: Can create Boards in all Board Groups within that Space, and inside each Board they can create Item Groups and items.
- Board Group Admin: Can create Boards inside their assigned Board Group, and within those Boards can create Item Groups and items.
- Board Admin: Can create Item Groups inside their Boards and add items within those groups.
- Item Group Admin: Can create items inside the specific Item Group they manage.
This layered control system ensures that item creation aligns with workspace hierarchy—balancing flexibility for teams with governance and role-based accountability.
Related Resources #
To continue learning about related features, explore:
- What is the Work Panel?
- What is a Space Group?
- How to create a Space Group?
- What is a Space and How to Create it?
- What is a Board Group and How to Create it?
- What is a Board and How to Create it?
- What is an Item Group and How to Create it?
Mastering how to create and manage items will help your team stay efficient, focused, and transparent across all workspaces.